Load testing VerneMQ, the basics

This is the first post of a series on MQTT benchmarking. We'll only cover the basics here, but this will already show you that you can run pretty complex test scenarios very easily. If you use the right tools, that is.
We have developed and open sourced VMQ_MZBench, an MQTT load scenario tool a while ago. It is an extension (aka worker) to Machinezone's awesome MZBench framework (thanks for open sourcing it!)
What VMQ_MZBench can do, in short, is generate some MQTT load with specific patterns from an arbitrary number of benchmark nodes. The load is directed at your MQTT broker or cluster. From all of the client nodes, VMQ_MZBench collects real-time statistics and presents them in a nice Web GUI.
We'll start with the basics today and show the following:
- Learn how to setup the benchmark tools
- Use VMQ_MZBench on a local machine to test a local broker with a simple test scenario
- Learn how to start, monitor and interpret benchmarks from the WebGUI and the command line API
- Give a preview on running tests on Amazon with a click
1. Setting up MZBench and VMQ_MZBench
Installing Machinezone's MZBench is straightforward. Here's the short version copied from their installation guide:
$ git clone https://github.com/machinezone/mzbench
$ sudo pip install -r mzbench/requirements.txt
You'll notice that this needs Python and pip on your system, so make sure you have that. That's all for the installation.
To compile and run:
$ cd mzbench
$ ./bin/mzbench start_server
That's it. Well, one thing: this needs Erlang, of course. We recommend you get the OTP 18.3 version for your operating system of choice.
Note that the first 'mzbench start_server' command will take a while as it compiles everything. To check everything is fine, direct your browser to http://localhost:4800
What about VMQ_MZBench, the actual MQTT benchmark tool? Well, you don't even have to install it. We'll see why in a minute.
2. Let's run a local test
The first thing we need to be able to run a test is some sort of test scenario. In MZBench these are written in a Python style DSL called BDL (benchmark definition language). It's simple and very well documented on the MZBench site. We won't go into any details here.
Let's note one thing though: what VMQ_MZbench does, is add its own MQTT directives to BDL (functions like connect or subscribe). We have listed them here, if you're interested in a little more detail.
Scenarios
#!benchDL


#######
# Scenario:
# A single subscriber reading from "prefix/clients/#" topic filter
# 1k publisher publishing to exclusive topic "prefix/clients/{client_id}"
# Overall msg rate: 1k msg/s
# Message size: 150 random bytes
# Running time: 5 min
#######

make_install(git = "https://github.com/erlio/vmq_mzbench.git",
             branch = "master")

pool(size = 1,
     worker_type = mqtt_worker):

            connect([t(host, "127.0.0.1"),
                    t(port,1883),
                    t(client,"subscriber1"),
                    t(clean_session,true),
                    t(keepalive_interval,60),
                    t(proto_version,4), t(reconnect_timeout,4)
                    ])

            wait(1 sec)
            subscribe("prefix/clients/#", 0)


pool(size = 1000,
     worker_type = mqtt_worker,
     worker_start = poisson(1000 rps)):

            connect([t(host, "127.0.0.1"),
                    t(port,1883),
                    t(client,fixed_client_id("pool1", worker_id())),
                    t(clean_session,true),
                    t(keepalive_interval,60),
                    t(proto_version,4), t(reconnect_timeout,4)
                    ])

            set_signal(connect1, 1)
            wait_signal(connect1, 1000)
            wait(4 sec)
            loop(time = 5 min, rate = 1 rps):
                publish_to_self("prefix/clients/", random_binary(150), 0)
            disconnect()
OK, let's explain this scenario a little. It creates two pools. The first pool will only spawn one client, an MQTT subscriber with a Client ID of "subscriber1". It subscribes to the wildcard topic "prefix/clients/#". The second pool creates 1000 connections. Those are the publishers. We let them go through a loop where they publish for 5 minutes with a rate of 1 msg per second. By that we create a total message throughput of 1000 msg/s. The publish_to_self directive takes a prefix and adds the Client ID to it. With that trick we can create topics that are exclusive to their respective publishers. As a message payload, we create a random_binary payload of 150 Bytes.
The scenario also pulls VMQ_MZBench directly from Github, so you don't even have to install it locally, if you don't want to.
Web GUI
Now let's see how we can run this little fan-in scenario in the MZBench Web GUI. Go to http://localhost:4800 and click on New to create a new test. Give it a new 'Name', but keep the 'Nodes' and 'Cloud' as they are. The 'dummy' cloud is just your local nodes.
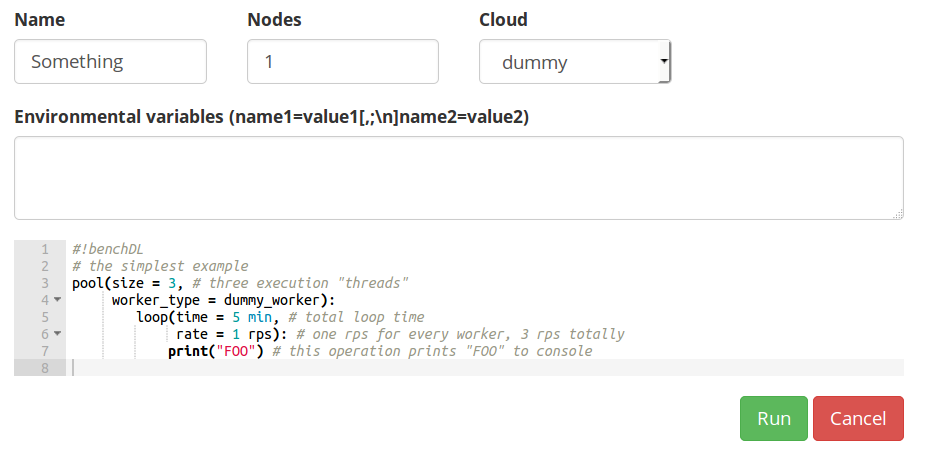
Make sure you have a local MQTT broker running at 127.0.0.1:1883. Then Copy & Paste the scenario and click on Run.
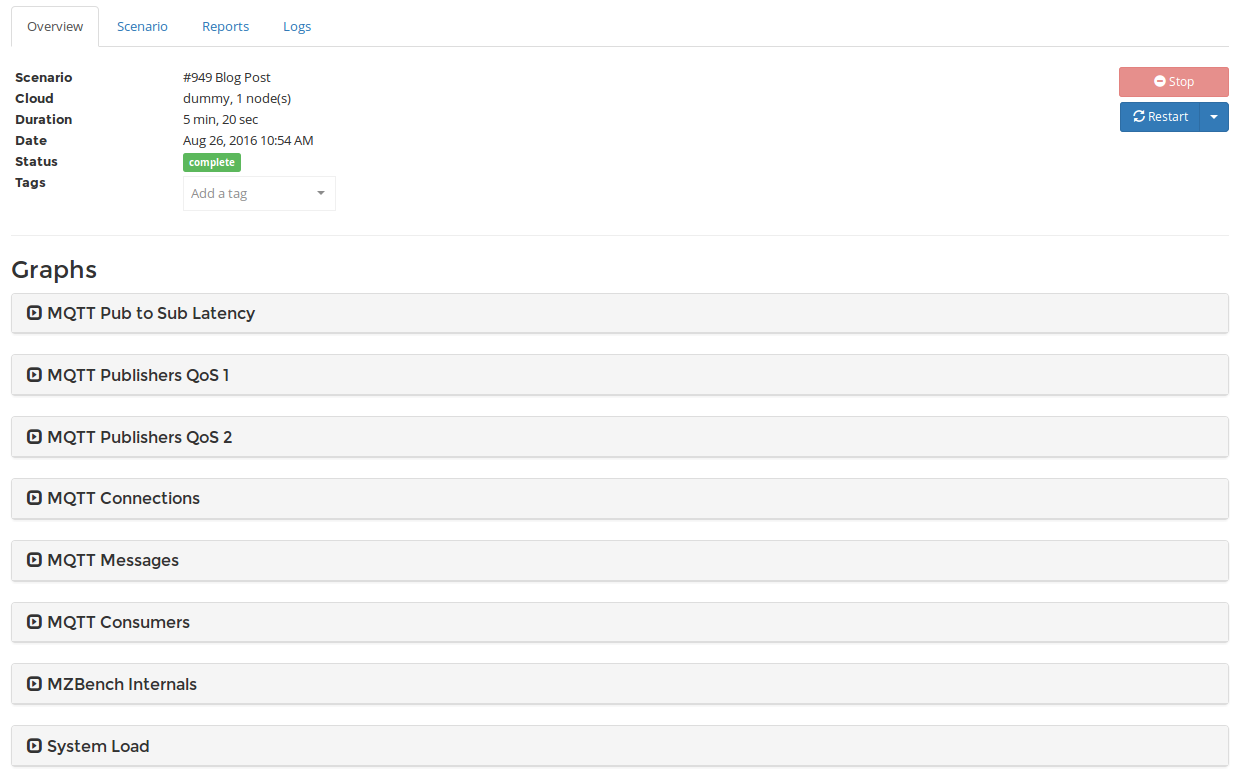
After a while you should start seeing pretty graphics which you can explore interactively:
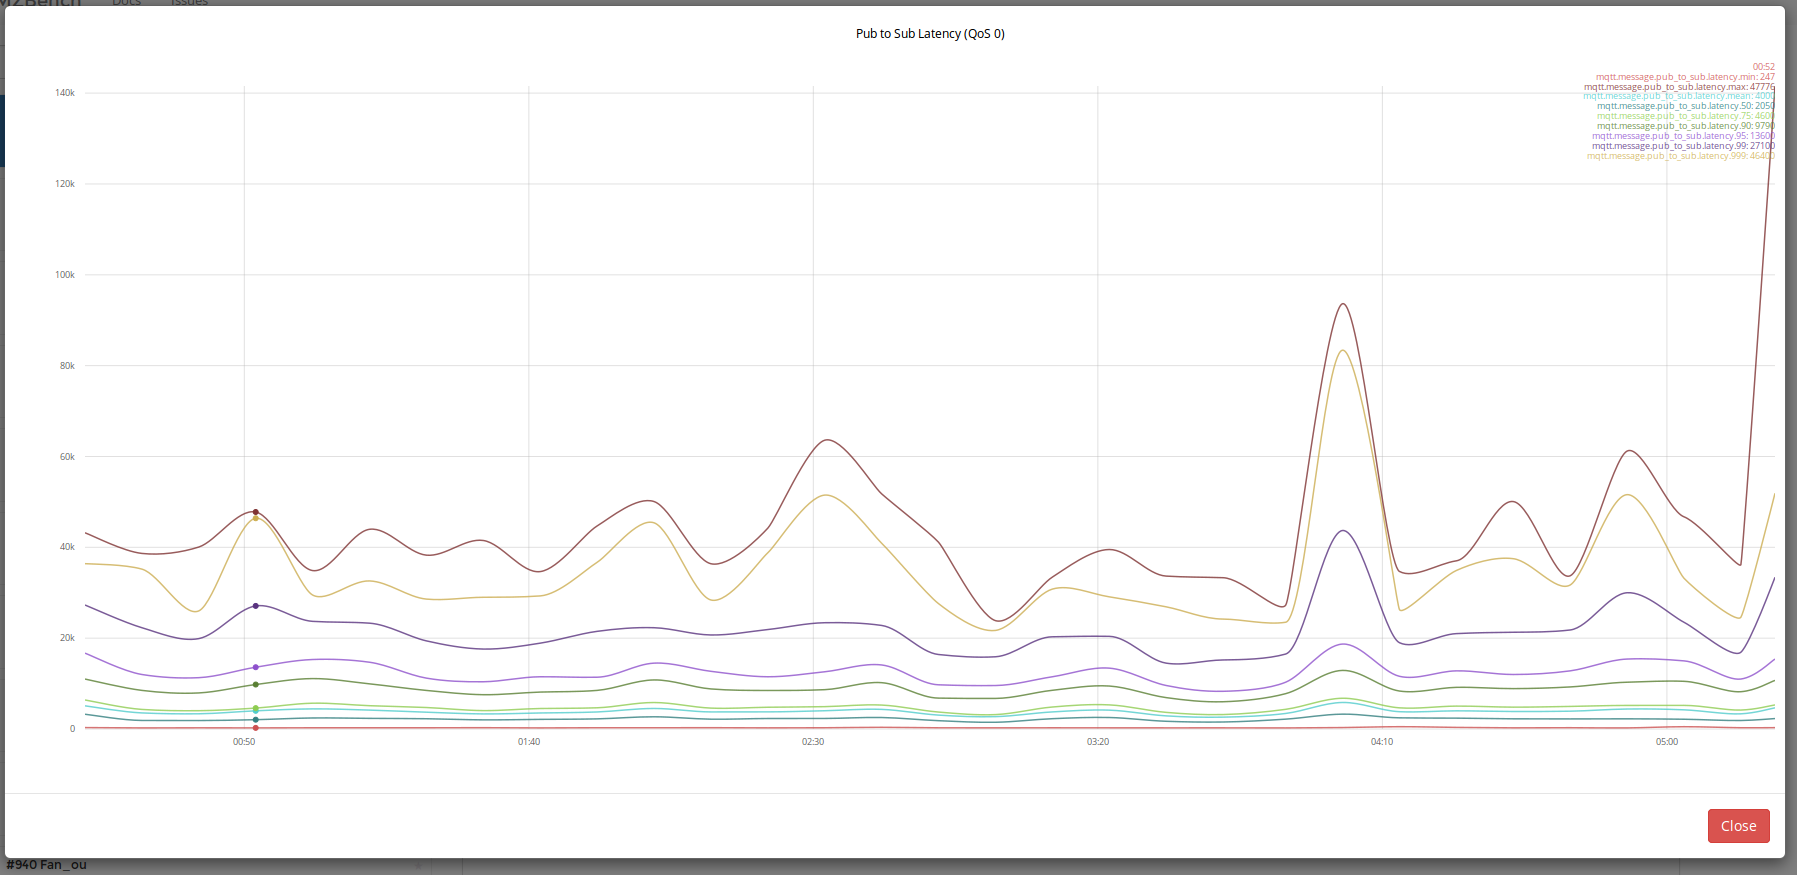
This specific example shows the end-to-end latencies in microseconds (so 40k microseconds are 40 milliseconds). Just explore the graphs for a while, you can see published and consumed message rates (they should be the same), how many consumers there are (1), how many connections in total (1001) and a couple more.
Note that the numbers are not realistic here. We have the benchmark, the collection, the server and possibly a lot of other software (like Firefox) running on the same system. Any garbage collection in applications might show up as latency peaks in your tests, for instance.
API and CLI
You can also run tests by using the HTTP API that MZBench provides or the CLI mzbench command.
This can be as easy as running mzbench start --nodes=5 foo.bdl
4. Running on Amazon
So, how can you run load tests that are a little more realistic?
The basic answer is to separate the systems of course. You'll have a benchmark cluster of nodes, you'll have your broker(s), and you'll have the director and API node for MZBench.
We will describe in detail how to run tests on an Amazon Cluster in a future blog post! The biggest hurdle is configuring MZBench in the ~/.config/mzbench/server.config with a EC2 Cloud Plugin. Here's a preview to get you started with a simple EC2 Cloud Plugin. Note that your setup can be much more complex and nested if needed.
[
  {mzbench_api, [
    % only dummyplugin which allocates on localhost is available by default
    {cloud_plugins, [{dummy,#{module => mzb_dummycloud_plugin}},
    %% ]},

    % For ec2 allocator specify your credentials and uncomment the following lines
    %{cloud_plugins,
   % [
    {ec2, #{module => mzb_api_ec2_plugin,
                             instance_spec => [
                            {image_id, "ami-ee8d718e"},
                                  {group_set, ["MZbench_cluster"]},
                                  {key_name, "my_key_oreg"},
                                  {subnet_id, undefined},
                                  {instance_type, "c4.xlarge"},
                                  {availability_zone, "us-west-2b"},
                                  {iam_instance_profile_name, undefined}
                                ],
                             instance_user => "ec2-user",
                             config => [
                                  {ec2_host, "ec2.us-west-2.amazonaws.com"},
                                  {access_key_id, "YOURACCESSID"},
                                  {secret_access_key, "YOURSECRET_ACCESS_KEY"}
                                 ]
                            }}]},
Cheers & Forward!
André & The VerneMQ Mission Engineers